One of the easiest songs that was composed by Nigeria’s music legend Tu-face Idibia is his hit track “African queen” that brought him into the lime-light few years back.
I’m going to show you how to play the song as


a guitarist or as a pianist. Music is Universal, what ever you you play on one musical instrument can be played on another musical instrument, it’s all based on the same principle.
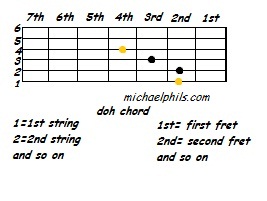
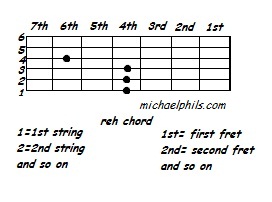
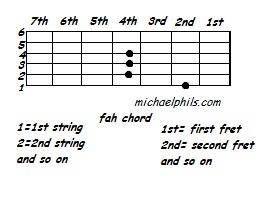
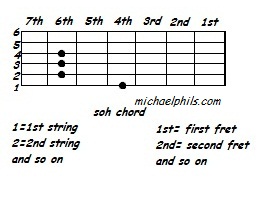
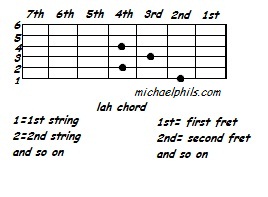
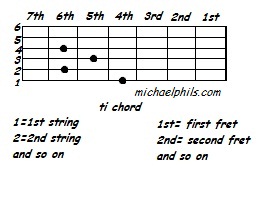
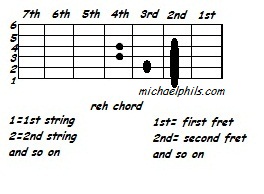
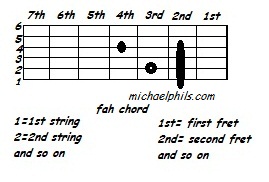
The chord progression of the song is C Aminor F G; using tonic solfas it is doh lah fah soh.
The pianist can just go ahead and play these chord progressions on and on and on, But the guitarist used arpeggios to play the progressions. On the guitar and piano its the same progression
C Aminor F G or doh lah fah soh.
If you are looking for a guitar chord chart to get the chord for the following progressions written above, the links are provided below
To make use of open chords click here, by open chords i mean chords that you play at the neck of the guitar
To play the chords on any part of the fret board depending on where you have your root notes, click on any of the links below, because we have provided two different ways to do that.
The video would be available shortly. I hope this helps.